
How to set up static websites with Github Pages
I was considering creating a profile page or a blog for myself for a while. However, I was puting this idea off basically because creating content for your projects is not the easiest task and having to set up a website makes you procrastinate even more. Not any more!
It took me a couple of minutes to set up a profile with GitHub Pages. You can have your website freely hosted on GitHub’s github.io domain or on your custom domain.
GitHub Pages is a static site hosting service that takes HTML, CSS, and JavaScript files straight from a repository on GitHub, optionally runs the files through a build process, and publishes a website.
I started looking for a minimalist theme ideas for my profile page and came across this open source theme by DataOptimal which was built on top of the Minimal Mistakes. In the following are the steps that I followed to deploy a version of it myself.
- Navigate to
dataoptimal.github.iorepository here and fork this repo.

-
Go to your repositories, the repo you just forked must have been added on your GitHub profile. You now have your own copy of the repository and can customize the files.
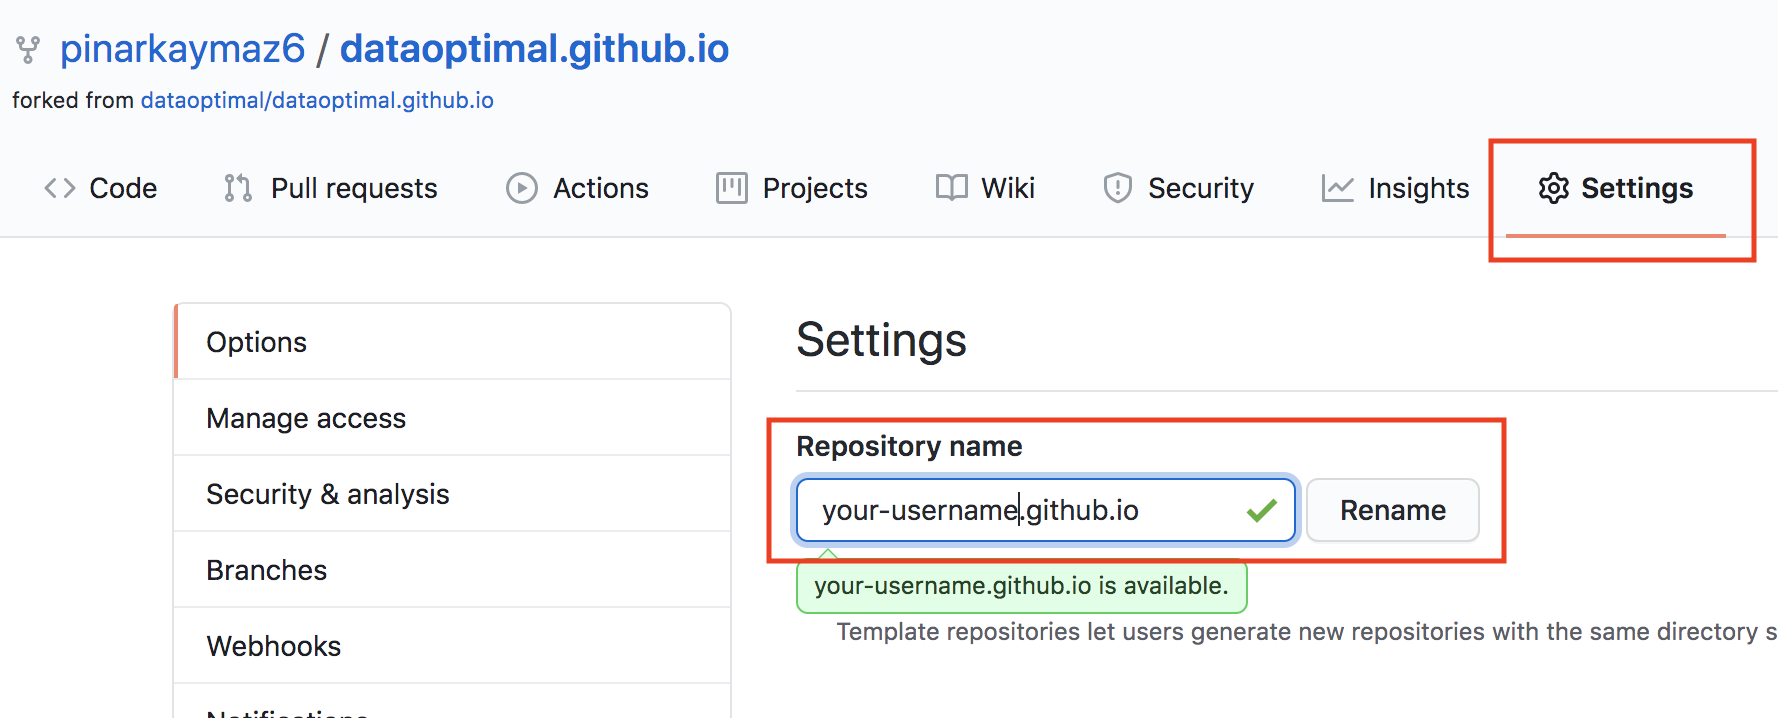
-
It’s time to change the repo name. Go to
Settingsin your repo and edit repository name as seen below. The repo name should follow the convension and it should be your GitHub handle followed bygithub.io. Mine ispinarkaymaz6@github.io.
-
If you rename your repo correctly, go check your website. It should be up and running shortly on
your-username@github.io. -
Now you can customize your website and publish content in
Markdownformat. Go ahead and clone this repository on your machine. - Go into the
your-username@github.iofolder and open_config.ymlfile in your favorite editor. Now replace theauthorattributes with yours.- Replace the names and the images.
- Add your social media accounts.
- You can also change the skin of the website by updating
minimal_mistakes_skinon top of the config file. Mine isdirt. - Integrate Analytics
One of my favorite things aboutMinimal Mistaketheme is that the setup for the analytics is already in place. In_includes/analytics-providersfolder, there are couple of base html pages with tracking code. All you have to do is to add yourTracking IDin to the_config.ymlfile. For example, if you are usingGoogle Analytics, you can set values as seen below. If you don’t have a tracking ID, go to Google Analytics dashboard to start analytics service and get your tracking ID.analytics: provider : "google-universal" google: tracking_id : "XX-XXXXXXXXX-X" - To create a post, navigate to the
_postfolder and create aMarkdownfile following the naming conventionYYYY-MM-DD-<URL-PATH>.md. - Your changes will be deployed once you push your changes. Now, push your changes to
masterbranch and go check your website. It might take a minute to deploy, then try hard refreshing (cmd + shift + R) to see your changes.
This is all. I hope this was helpful.